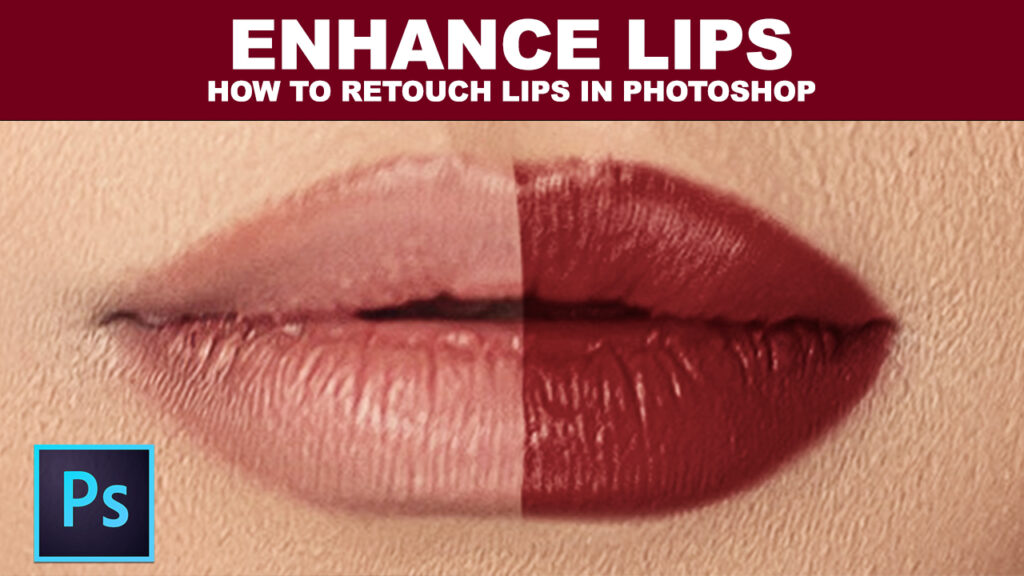
Hello everyone, welcome to my blog. Today, you will learn the best way to make your lips pop in Photoshop.
This effect works well on all types of portrait photos and has the most realistic effect. The following are a few steps to achieve this effect.
- Make a selection of the lips
- Select a solid layer adjustment
- Change blend mode to multiply
- Adjust the underlying layer with bled if
Step 1
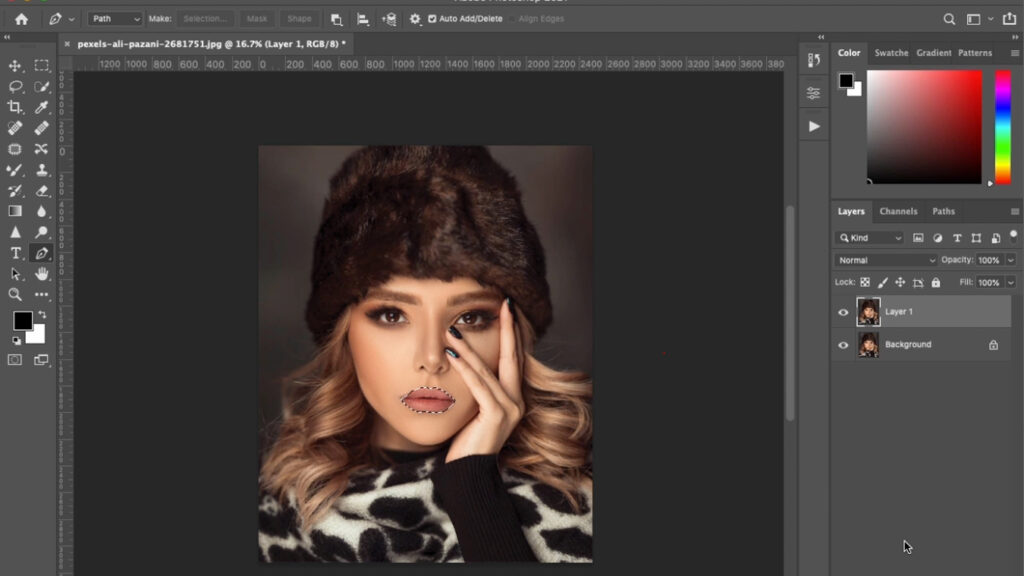
Make a Selection of the lips
There are different tools in Photoshop for selection such as the pen tool, lasso tool, quick selection tool, etc. The commonly used selection tool for precise selection is the ‘Pen Tool’, for automatic selection is the ‘Quick Selection Tool’ and the ‘Lasso Tool’ is used for freehand selection.
For this tutorial, we shall be using the Pen Tool for precise selection. Make a Selection of the Lips you want to enhance and use a feather of 3 pixels.

Step 2
Create a Solid Layer Adjustment
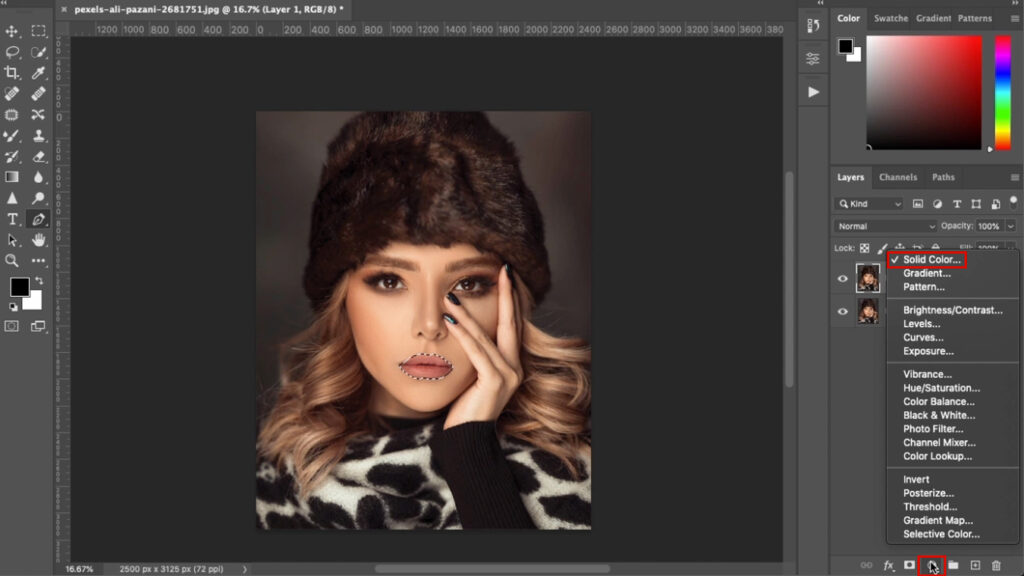
Once the selection of the lips is achieved, create a new adjustment layer by clicking on the icon located at the bottom of the Layers Panel. Choose “Solid Layer Adjustment”.
In the Solid Layer adjustment, you will find a different range of colours to choose from. Select the colour that blends well with the portrait. Since it is a non-destructive editing you may wish to tweak the colour at any time if you desire.

Step 3
Change blend mode to multiply
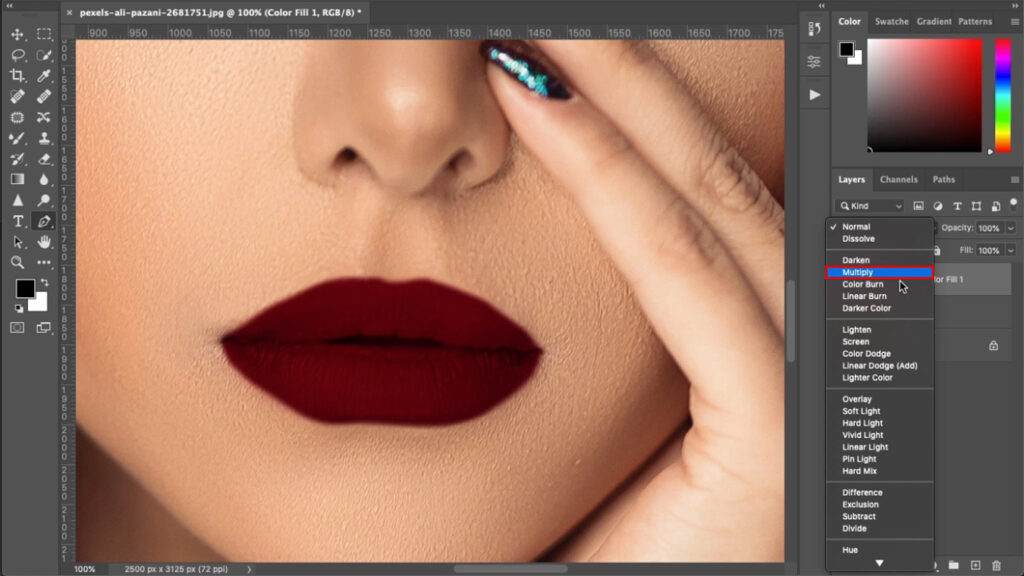
After you must have created a solid colour adjustment, Select a blend mode of multiply. This process blends in your selected colour.

Step 4
Adjust your underlying layer with “blend if”
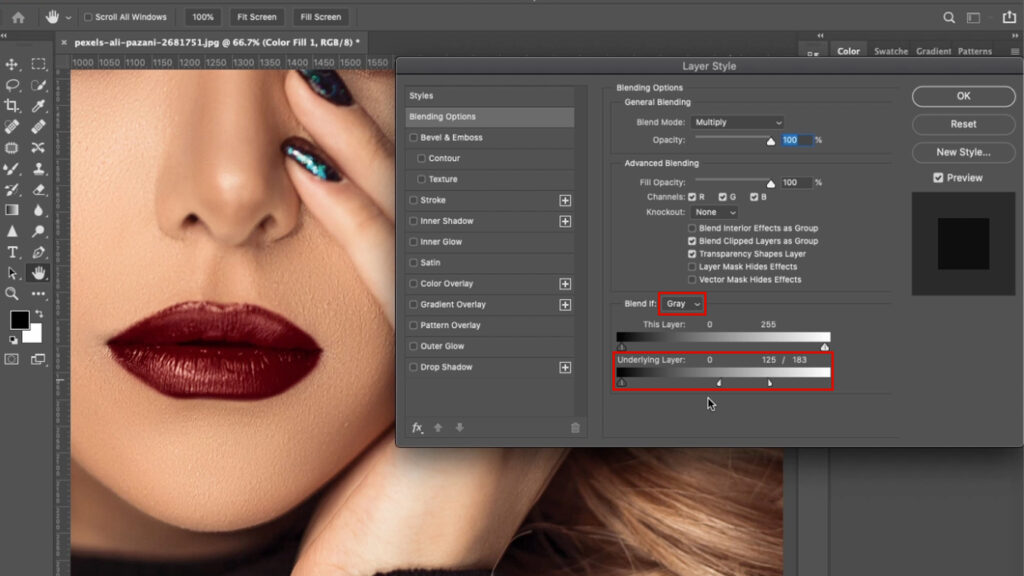
This is our last step in creating a realistic lip. Double-click on the “Solid Layer Adjustment” to reveal the “blend if” dialogue box. In the dialogue box, set the blend if option to “Grey”. Then move the highlight slider of the underlying layer to your left.
To further blend it, Hold ALT/OPTION to break the slider into two parts as shown in the image below.

You can make a few adjustments to your colours and brush areas if you think you went overboard.
Always remember that it is important to keep the enhancement very natural and be mindful not to overdo the enhancement in such a way it alters the original image.
Here is the video version of this post. You may find it easier to follow along step by step in the video format. If you like this video please support my channel by hitting the thumbs up and subscribing to my channel!
If you have also enjoyed this blog post, you can share and pin it for later. I am also on Pinterest. Thank you.
Keep creating, and Keep practising!
Photo credit: Ali Pazani from Pexels
Interesting tutorial. I want you to write on how to edit products. Thank you.
Thank you for finding time to read. Your request is noted.
Everything is very open with a precise clarification of the challenges. It was truly informative. Your website is useful. Many thanks for sharing!
Thank you.